Objective.
This is the first in a series of introductory articles intended to help new contributors become familiar with the Users’ Knowledge Base (UKB) publishing procedures, so that they can quickly move to productive endeavors. The first few articles will focus on WordPress and will demonstrate all of the basic skills required to enable contributors to post, using WordPress as the blogging tool. Later articles will cover third party publishers, including third party visual editors and screen capture tools.
Introduction
The UKB is built on the free weblog platform and blogging tool WordPress. Information on WordPress , including documentation, support and forums can be obtained from:
http://wordpress.org/
The UKB site is hosted and administered by AmiBroker .
The WordPress documentation provides information on advanced features and administrative details. It is not necessary to be familiar with the details to be able to contribute. (Some of the features mentioned in the WordPress documentation were not required for the UKB site and have not been incorporated into the customized version used by AmiBroker). WordPress, in it’s standard version, assigns roles and capabilities to users as a fundamental part of it’s operating model. There are five roles; Administrator, Editor, Author, Contributor and Subscriber. For ease of use, and to facilitate a self-managed site, AmiBroker has chosen to enroll the majority of contributors as Authors. Capabilities, which are task orientated, are assigned to the Roles incrementally, at the Administrators discretion. AmiBroker has elected to provide Authors with the authority to upload files and edit, as well as publish, their own posts.
For additional information on Roles and Capabilities refer to the WordPress documentation:
http://codex.wordpress.org/Roles_and_Capabilities
WordPress Publishing Procedures
Login
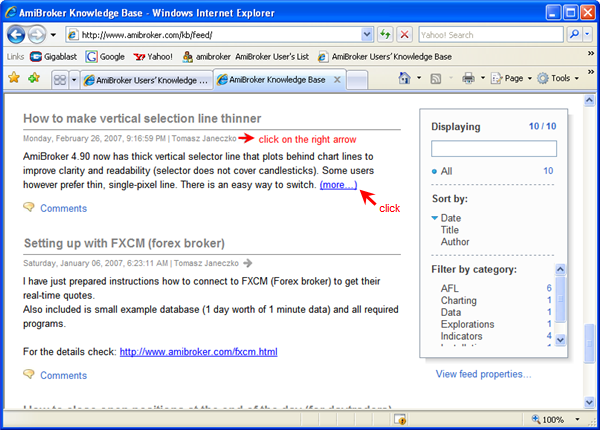
To be able to write and publish in WordPress approved Authors need to login to the WordPress Administrative Center via the UKB homepage.
To login to the WordPress Administrative Center:
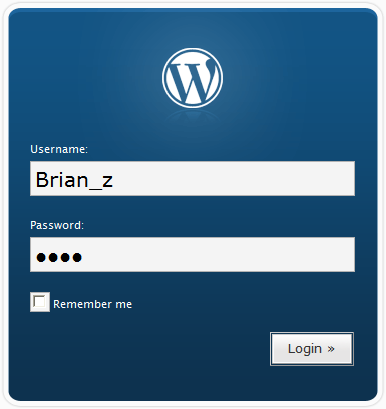
- obtain a Username and Password from support [at] amibroker.com
- click on Login, in the right hand sidebar of the UKB homepage, and enter your Username and Password into the Login Window,
- then click the Login button.
To remain logged-in for long periods Remember me can be checked. Once logged-in, with Remember Me checked, the links in the Meta section of the UKB sidebar will change to Site Admin and Logout. Clicking on Site Admin will take logged-in users straight to the starting panel. Alternatively, a shortcut placed on the desktop will also provide direct access to WordPress for those who remain logged-in. (Note that the sustained login stores the logged user in a ‘cookie’ on the local computer. It may not work for those who have disabled their ‘cookies’).
WordPress Administration
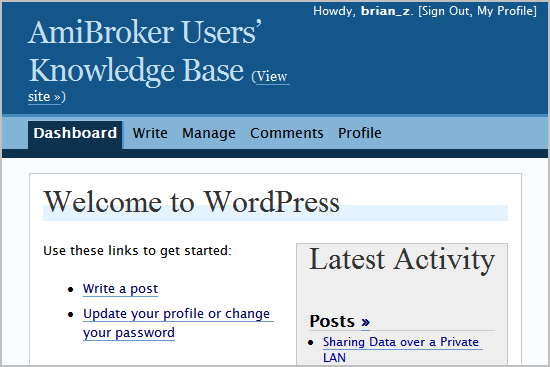
A successful Login will open the WordPress Administration Center with the Dashboard as the default view.
For Authors there are four other panels, besides the Dashboard, available: Write, Manage, Comments and Profile .
For an overview of The Administration Panels refer to the WordPress documentation:
http://codex.wordpress.org/Administration_Panels
WordPress Administration Initial Setup
On the first visit to the Administration Center there are some preliminary tasks to perform.
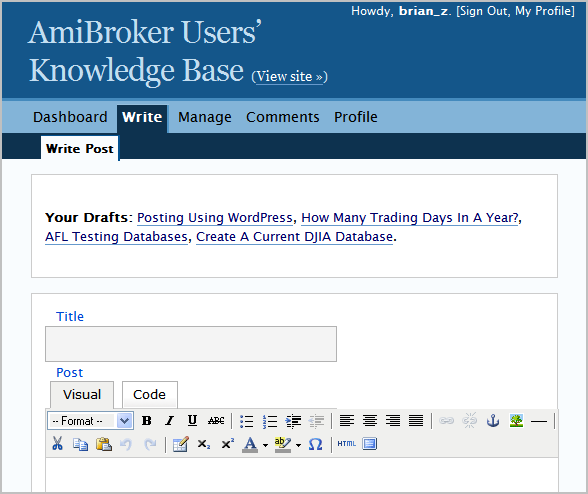
To start, click on Write . This will open the Write Post Sub-panel with the Visual Editor as the default view.
The Visual Editor is an add-on feature to the basic WordPress software. Unfortunately it has many faults and it is recommended that it is not used. It also causes conflict with ‘code’ tags, a custom feature provided by AmiBroker for displaying AFL formulas, and other third party WYSIWYG editors. The Visual Editor should be turned off.
To turn off the Visual Editor:
- go to the Profile panel,
- uncheck Use the visual editor when writing ,
- and click on the Update Profile button.
A confirmation message box will appear to acknowledge that the Profile has been updated.
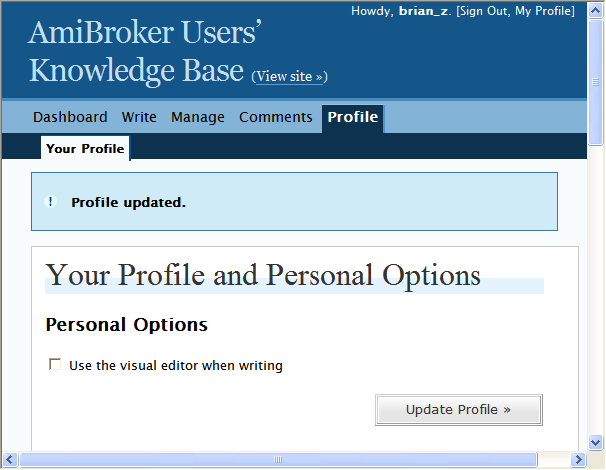
The password provided by AmiBroker can also be customized in the Profile Panel , and personal information can be entered and updated at the same time.
The Write Panel
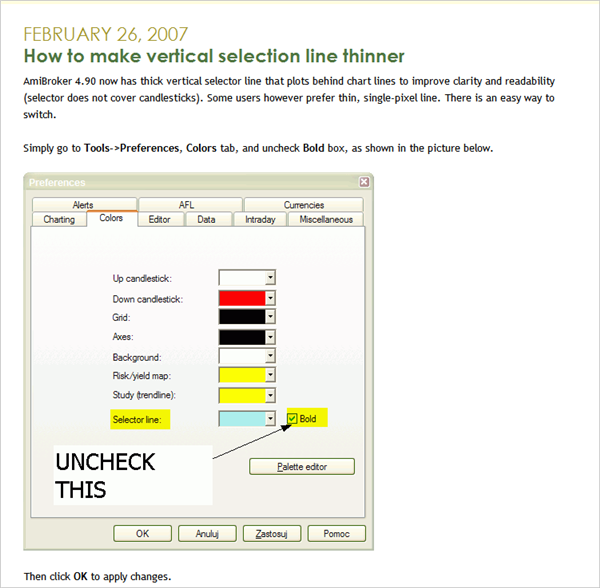
After updating Personal Options return to the Write panel and the default view will now be the Code Editor. Those familiar with HTML can write posts directly into the Editing Window .
Start by entering the Title . It can contain any words or phrases. Commas, apostrophes, quotes, hyphens, dashes, and other typical symbols can be used. WordPress will retain symbols in post titles but remove them from links used within the program. Avoid using the same Title twice as that can cause problems.
Above the Editing Window is a collection of buttons, or Quicktags, that produce snippets of HTML for applying formats; bold, italic, image, links, lists etc. How to use Quicktags will be demonstrated in a separate article Introduction To The Code Editor .
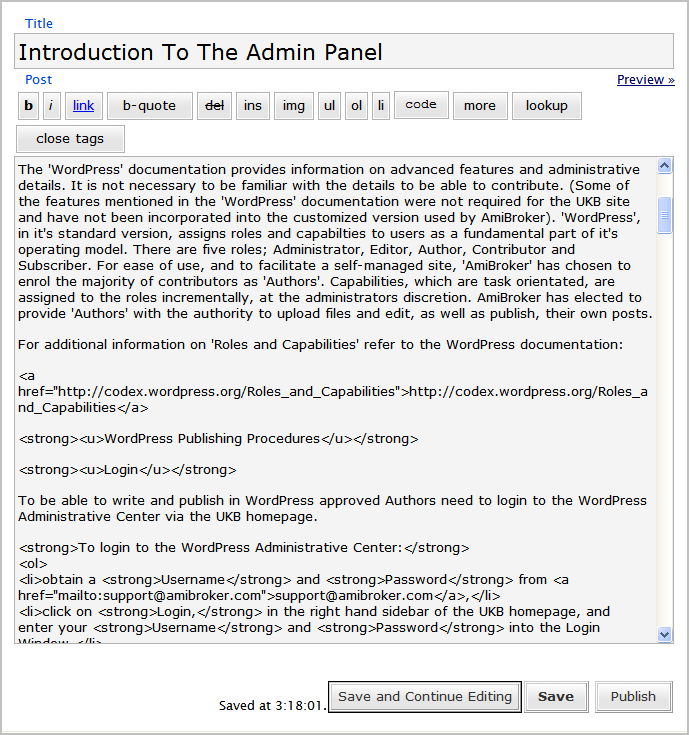
As an example of HTML publishing, a segment of the code that underlies this post has been included in the screen-shot above.
(The image was captured at one of the draft stages of writing and may differ from the published version).
For those unfamiliar with HTML a basic example will be provided in a separate UKB post, Introduction To The Code Editor. Users who prefer GUI methods need not be concerned as help with using a visual editor will be available in a separate UKB series, Using Visual Editors .
As well as providing an interface for post content, the Write Panel also has a range of input boxes that provide users with publishing options.

They can be expanded by clicking on the cross in the top right of each box.
Before saving for the first time check that the posting options have been initialized to their defaults:
- Categories – {empty}
- Discussion – Allow Comments, Allow Pings
- Post Password – {empty}
- Post Slug – {empty}
- Post Status – Draft
- Post Time Stamp – current date/time
- Page Order – zero
- Trackbacks – {empty}
- Custom Fields – {empty}
- Optional Excerpt – {empty}
As writing progresses, the post can be saved as a draft.
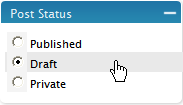
To save a post as a draft:
- select the Draft radio button in the expandable menu box to the right of the Editing Window,
- click on the Save and Continue Editing command button,
- or click on the Save command button if ending the session.
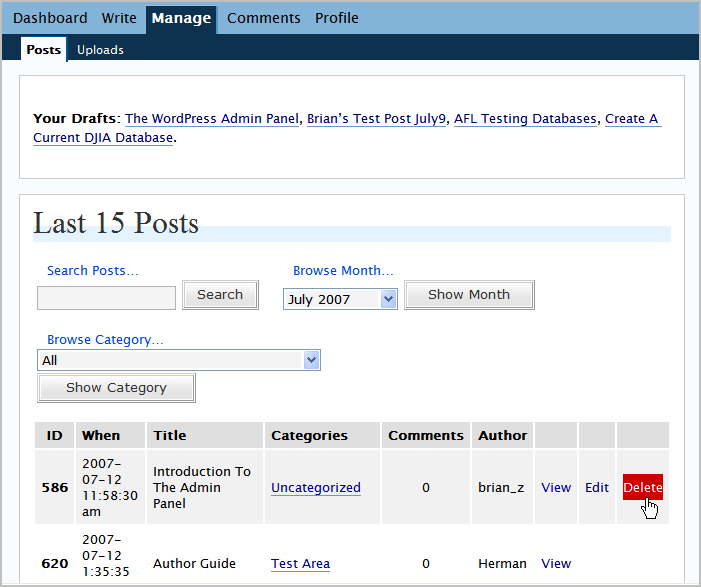
The post will be saved as a draft and a Preview>> link will appear in the top right hand corner of the Editing Window. Clicking on this link will open the post in web view to allow the Author to check the post as it will look when published. After saving for the first time, the page will be moved from the Write panel to the Manage panel and a Delete this draft button will be added to the bottom left of the page. Drafts will not be visible to the public, but other contributors to the UKB site might be able to read them. They will appear in the Your Drafts list at the top of the Write and Manage panels. Clicking on a title in either of those lists will load it for further editing. (Posts do not appear on the Mass Editing list, until after they have been published).

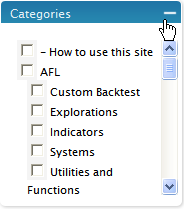
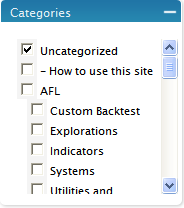
After saving a draft for the first time it will be listed as Uncategorized and Uncategorized will automatically be moved to the top of the Categories list. It will remain there until the post is assigned another home. (The category that a post is assigned to appears at the top of the Categories menu box by default).
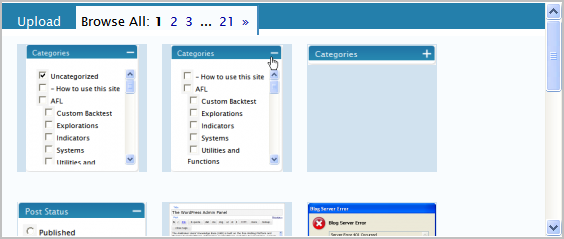
The Upload Sub-panel
Images can be inserted into, or linked to, posts in various ways. (For simplicity, this example will refer to images only but the instructions are also applicable to other types of files). This is managed from the Upload Sub-panel, which is located in the area below the Editing Window. Initially there are two [tabbed] sub-panels in view; ‘Upload‘ and ‘Browse All’. Essentially ‘Browse All’ is like a file library, to which images or files can be uploaded. Images are listed in the browse page as thumbnails and files are listed as thumbnail size icons that contain the file name in text.
(Note that images uploaded using some third party Visual Editors may not appear as thumbnails. Some software will produce images that use file icons).
To browse the file library:
-
click on the Browse All [tab],
-
select the required page number (use the page >> arrows to move through the complete range),
-
use the scroll arrows at right to view all the thumbnails on each page.
The files in the library are common property; they are a collection of all of the images and files uploaded to the site by all users, since the site inception. An Author can use any file, but they can only delete their own files or images. Only the Administrator or the Editor can delete common files.
The complete catalog of files can also be viewed by selecting the Uploads [tab] at the Manage Panel .
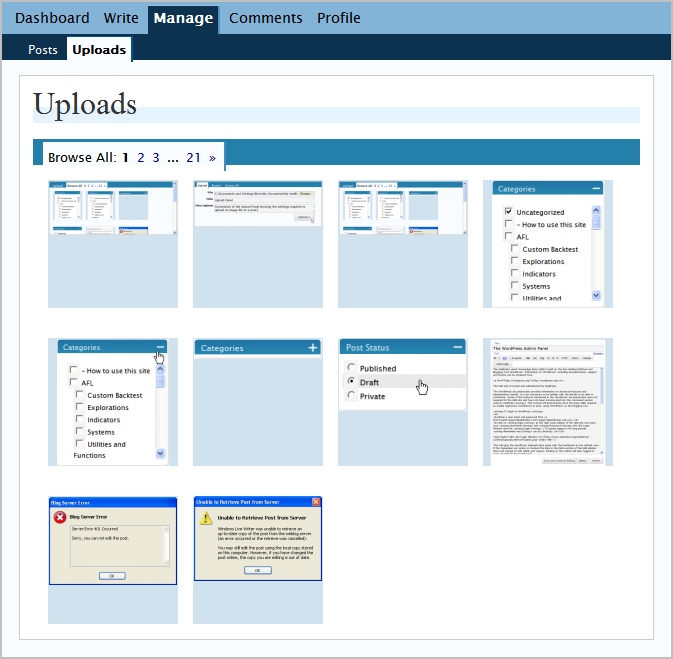
Authors can upload files for their own, or common use. Once a file has been uploaded another [tabbed] Browse Sub-panel will appear. It will only contain the files and images that belong to the particular post that is current at the time. Files in the Browse Sub-panel have the same appearance and behavior as files in the common library and they have joint membership of both groups.
When uploading files the Author has the option to enter a Title and a Description. If an image is inserted into a post, the Title will appear as text when the mouse is hovered over the image (this may not hold true for all browsers). It will also be the text displayed if a Title is inserted as a link. The Description is only used if an image is linked to a page (it will be included as page content).
To upload files:
-
click on the Upload [tab] to open the sub-panel,
-
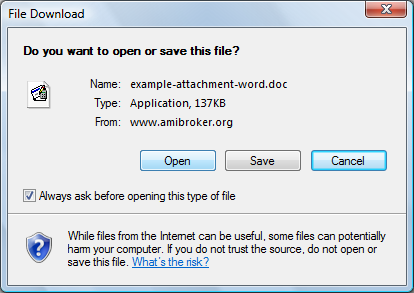
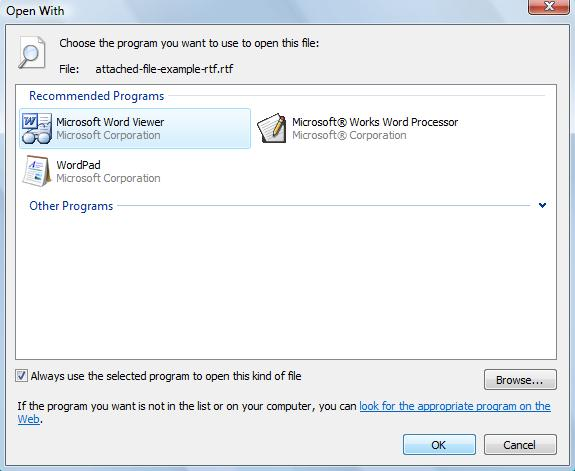
use the Browse button to find and select the required file from the local computer (the standard MS browse window will open),
-
enter a Title (if a title is not entered the default will be the name the file has on the local computer),
-
enter a Description (if a description is not entered the default will be {empty}),
-
click on Upload.

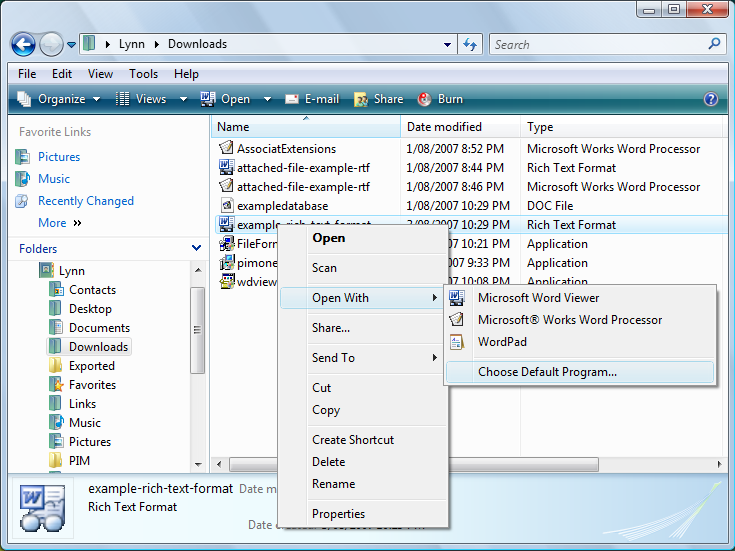
After uploading the file can be inserted into a post at any time e.g. images can be shown in a post as a thumbnail, or as originally sized, with the option to link to a file or a page.
To insert an image :
-
left click on an image in the post library (Browse), or common library (Browse All ) to view the Insert menu;
-
select the Thumbnail or Full size option,
-
select Link to None ,
-
hit the Send to editor >> button.
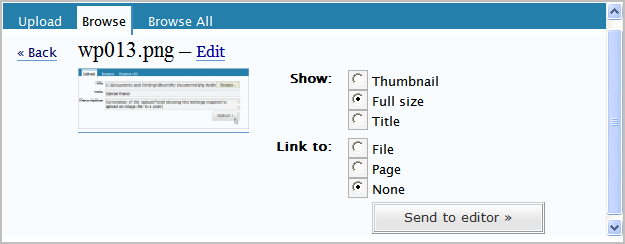
The defaults for the Insert menus are Thumbnail and File . There are several possible ways to insert images, however the author of this document finds some of them have no practical use e.g. inserting an image as a page link is not recommended as the image produced has very poor quality. Users can experiment with the different combinations to find what works for them, or suits the style of post they want to make. All of the images in this post were inserted full size with no links. This is the recommended method as it allows readers to print the posts with the full size images included.
(Note that if page linking is not going to be used there is no need to file the Description , as it is only used in linked pages).
It is also possible is to insert images that open from text or thumbnail links. Some authors may prefer this as it provides a more compact post.
To insert a linked image:
-
select the Thumbnail or Title radio button,
-
select Link to File ,
-
hit the Send to editor >> button.
This will insert a Thumbnail, or the Title , into the post as a link. When they are clicked on by readers the full size image, as uploaded, will open in a separate window.
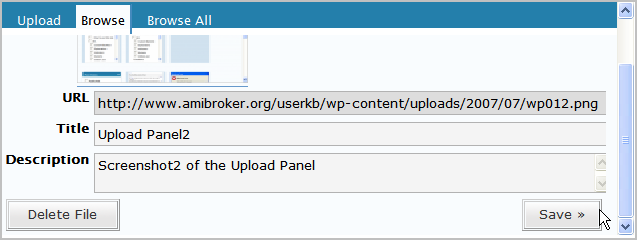
The Title or the Description of the file can be changed at any time.
To change the Title or the Description:
- click on the image,
- click on the Edit link that is appended to the file name in the Browse – Insert sub-panel (edit and insert are alternate views in the Browse sub-panel and they can be toggled back and forth via the Edit/Insert links),
- over-type new text into the input boxes,
- click on the Save>> button at the bottom of the Edit sub-panel.
Note that this only changes the Title and Description for any subsequent inserts. It does not change them for images that are already inserted in a post. The Edit settings are pre-conditions and they are not dynamically linked to inserted files. The image properties; Title, Description, Show and Link are captured in code on the initial insert. After files have been inserted their properties can only be modified by changing the code. The exception to this rule is linked pages, which are dynamically generated each time they are opened. Images or attachments can only be deleted from a post by deleting their code. There is no warning given when removing images from posts in this way.
For additional information on Using Image and File Attachments refer to the WordPress documentation:
http://codex.wordpress.org/Using_Image_and_File_Attachments
Publishing
When writing is complete and the Author is satisfied with the final version it can be published.
To publish a draft:
- open it from the Your Drafts link at the top of the Manage panel,
- click in the Uncategorized checkbox to deselect it,
- select the Category of choice,
- click on the Publish button below the editing window.
The post will be published and it will be moved from the Your Drafts list to the Mass Editing list on the Manage Panel . It will appear at the top of the list (the list is ordered by published date). All published posts are listed and they can be viewed from the list. Author owned posts can be edited or deleted by clicking on the appropriate link.
Published posts can be returned to Draft status by changing the Post Status setting and Saving the post. It is not recommended to do this as RSS feed readers may receive additional copies when the post is republished.
Please try to avoid publishing until the final draft version has been carefully checked, as visitors to the site may have RSS feeds enabled. Any published version of a post will appear in user’s RSS lists, even if the post is deleted at a later date. Once a post is published there is no guaranteed way to take it back.
Editing Published Posts
When a published post is opened for editing it opens in the same template as the draft, except that the Delete this draft button changes to Delete this post and the Timestamp, which tracked current time in the Draft , will be set to the published date-time. This can be confirmed from the Post Timestamp box. In the Draft this reports current time only.
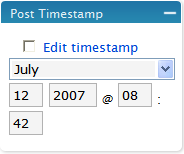
In a published post the Timestamp is frozen and text confirmation of the published time is included.
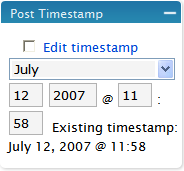
(Note that the post is sorted by the Timestamp in various places, including; the Mass Edit list, Searches, Archives and Categories or Subcategories when selected from the sidebar drop-down).
All the other editing features for published posts are identical to those used when drafting.
(Note that changes to the Upload Panel and main editing panel are not automatically saved. The Upload Sub-panel edits need to be saved using the local button and changes to drafts or published posts should be saved at the Editing Window buttons before closing the page or publishing the post).
Deleting Published Posts
When a post is deleted any files that were in the local library will remain on the server in the common library. It is recommended to delete library files from the server before deleting a post, unless the author has a future use for them.
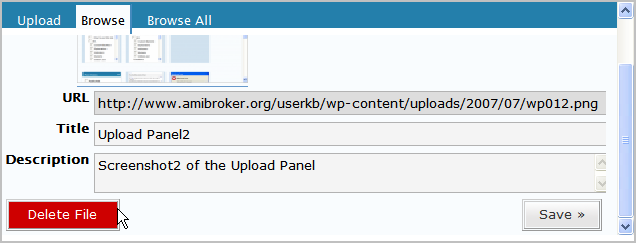
Uploaded files can be deleted from the Edit Sub-panel , but only by the owner.
To delete uploaded images:
- go to the Upload Sub-panel,
- click on the image,
- click on the Edit link that is appended to the file name in the Insert sub-panel,
- click on the Delete File button at the bottom of the Upload sub-panel.
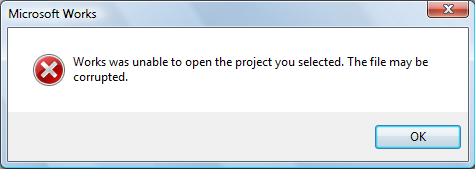
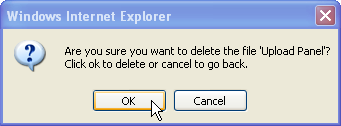
When the mouse pointer is hovered over the button it turns red to warn the user of the consequences of clicking on the button and a confirmation message box will open with a warning.
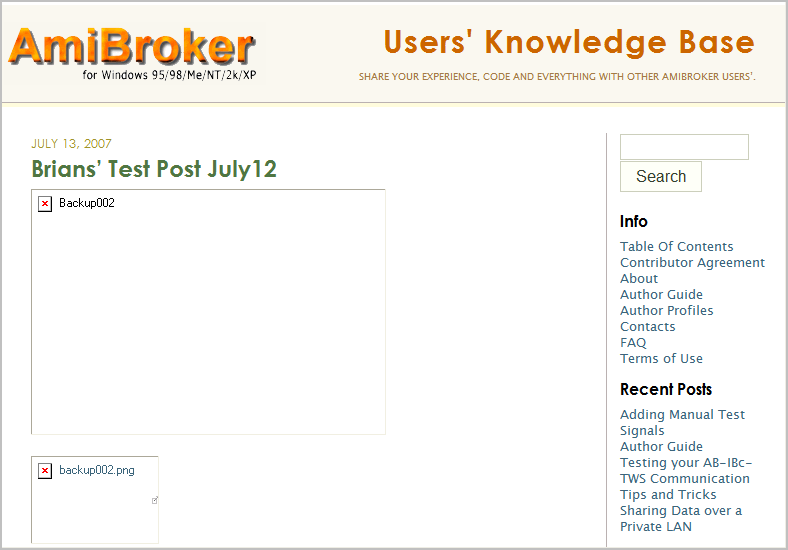
Notice the distinction between deleting files from a post and deleting files from the library. When a file is deleted from a post it is still in the library. When a file is deleted from the library it is deleted permanently. Where a post references a file that has been deleted from the library, the image will remain within the post as an empty shell, with the Title displayed as the alternate heading.
Comments Sub-panel
The final area available to Authors is the Comments Panel. Here Authors can modify or delete comments that are attached to their own posts.
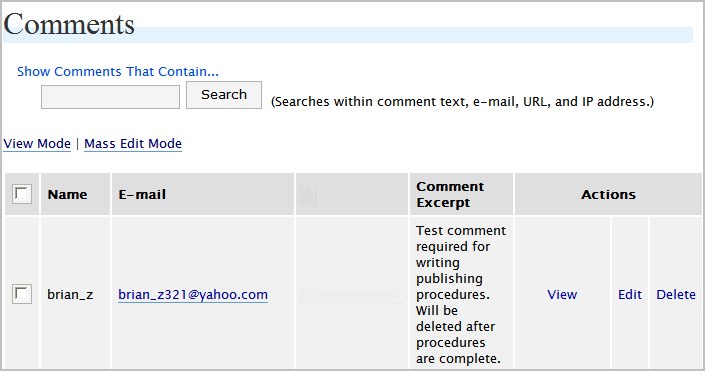
The Awaiting Moderation Sub-panel is also accessible from this screen but it doesn’t contain any content for Authors . Moderating and approving comments, and checking them for spam is looked after by the Administrator or Editor .
That completes this section on Using WordPress . For a better understanding please read it in conjunction with other posts in this series.
For additional information on Writing Posts refer to the WordPress documentation:
http://codex.wordpress.org/Writing_Posts
See you at the UKB Authors Forum ……………happy publishing!
add – post ID
add – upload library (second panel)
 Filed by brian_z at 5:35 am under Contributors
 2 Comments