August 16, 2007
Capturing Images Using Microsoft Paint (v3)
DRAFT
OBJECTIVE
The objective of this tutorial is to demonstrate how to use Microsoft Paint to capture screen images suitable for insertion into Users’ Knowledge Base (UKB) posts.
INTRODUCTION
Paint is a simple drawing and image editing tool that is generic to all versions of Microsoft Windows. It can be used to capture, and edit, screen images for use in UKB posts. The program can be opened from the operating system Start > All Programs > Accessories path. The program is limited in features but ‘professional’ level publishing skills are not essential for publishing to the UKB. Content is considered more important than the format! It is recommended for occasional authors, especially if a post only contains a few images, or for those who prefer not to have to buy screen capture software.
For additional information on Paint refer to: Paint (Software) from Wikipedia
Paint supports BMP, GIF, TIFF and PNG file-types. For a comparison of the suitability of each type, for web publishing, refer to: GIFF, JPEG or PNG
SPECIFICATIONS
This tutorial was written using Microsoft XPHome, Word 2002 and Paint V5.1.
CAPTURING IMAGES
Preparation
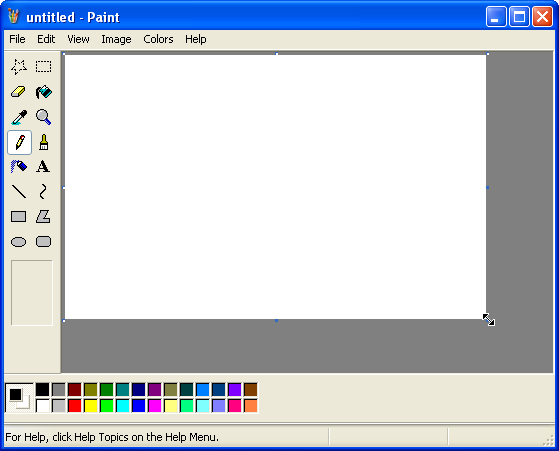
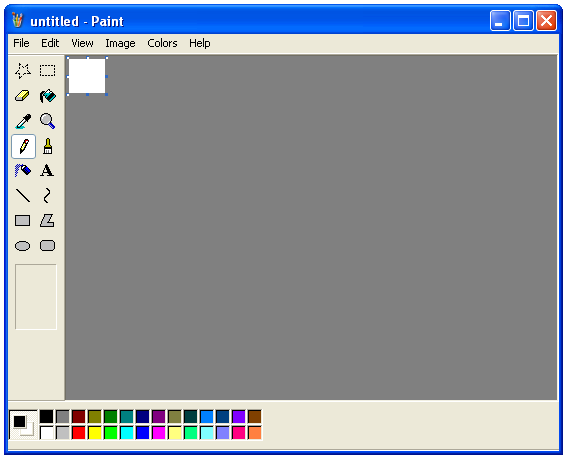
When Paint is opened the canvas (the white square in the Editing Window) will be the size of the last image that was used before the program was closed. The canvas needs to be smaller than the image pasted into the Editing Window or the image, when saved, will include the excess white space. As a time saver the default canvas size can be reset before each session.
Note: a small canvas will auto-size to a larger image but not vice-versa.
To set the canvas size:
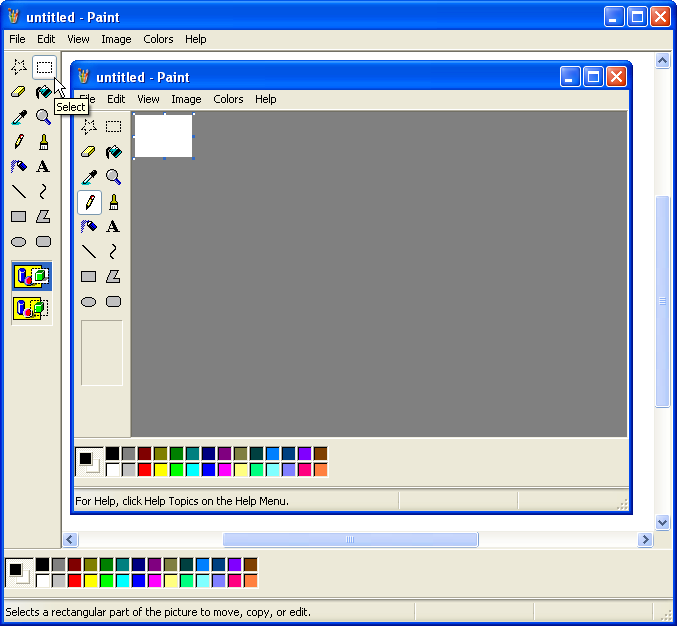
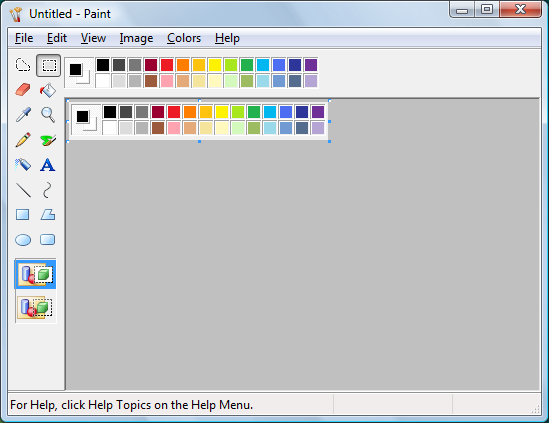
1) Open Paint and hover the mouse pointer over the bottom right corner of the canvas until a moving pointer appears.
Figure 1
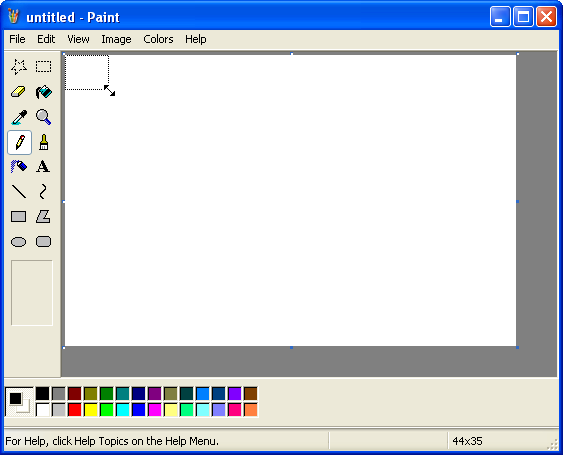
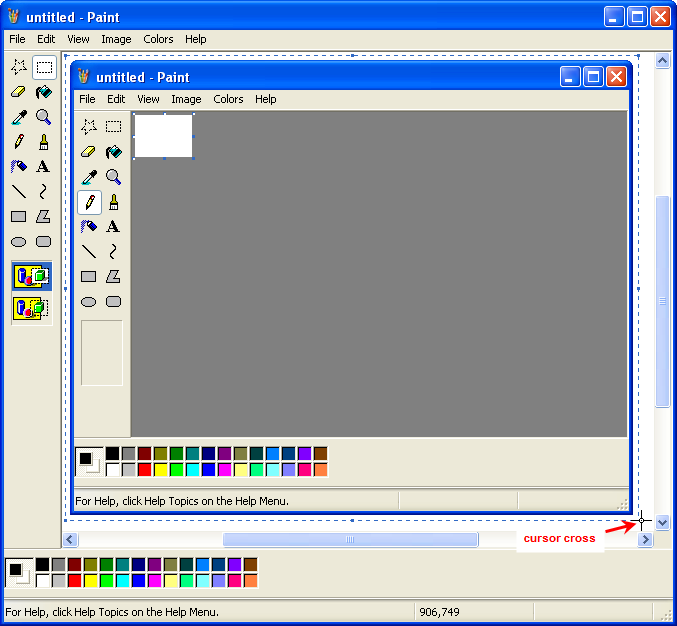
2) Hold down the left mouse button and drag the moving pointer to resize the canvas to a very small area.
Figure 2
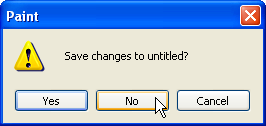
3) Close paint and click on No when asked to Save changes to untitled?
Figure 3

4) Open Paint again and the canvas will now be small (this will also be the default size for new canvasses for the session).
Sizing screen-shots:
Once an image is captured it will lose clarity if it is resized. Since the images are going to be inserted into a standard web-page, minus the width of the sidebar, (the width at the top of a UKB page is approximately equivalent to a letter size document in a word processor) it is better to keep them to less than around 6 inches, or 600 pixels (authors will need to experiment with this as pixelation varies from machine to machine). This rules out any chance of using clear full-size screen-shots in a standard post. One way to get around this is to alter the story line to avoid having to use full screen-shots. Another is to minimize and/or resize the window when taking large screen shots.
Note: this alters the proportion of the contents of the window so using this method is always a compromise between clarity and a faithful reproduction of what the user will see on their screen when they follow the instructions.
At other times, there is just no way around it and the show must go on, ‘grainy’ image or not. However, since the details contained in an image are often critical to UKB posts, full screen shots can be attached without resizing, provided they are not included in the first page (images that are larger than the available space will run off the page and overwrite the UKB sidebar if they are inserted at the top of the post). This makes for very large images, which will not view correctly in all web modes, but readers can easily find ways to view the full image and see the detail.
Note: As a UKB ‘page’ is scrolled downwards, the sidebar moves off the screen and the width available for publishing increases, so larger images can be inserted into a post after the first page. This is not the case for all web views e.g. when reading RSS feeds in I.E. v7 the sidebar is a permanent fixture, and it does not scroll off the page, which makes for a different page width in the reader compared to the ‘online’ view (in this case, images are trimmed, from the right, to fit into the available space.
A handy trick for sizing the images before capture is to open them in a second window, over the top of a Word document in Print Layout, and use the ruler in Word to align the image to the width of the document ( as a rule of thumb the image needs to be able to fit into a Word page without resizing).
To estimate image size:
- 1) Open a Word document in Print Layout.
- 2) Open Paint (it will open on top of the Word document).
- 3) Minimize Paint and use the mouse to drag the borders of the Paint window to the required size (as far as possible try to keep the width to height ratio constant).
- 4) Position the mouse pointer in the Title bar and click and hold the left button to drag the Paint window and align it over the center of the Word doc to ‘measure’ the size of the image.
Figure 4
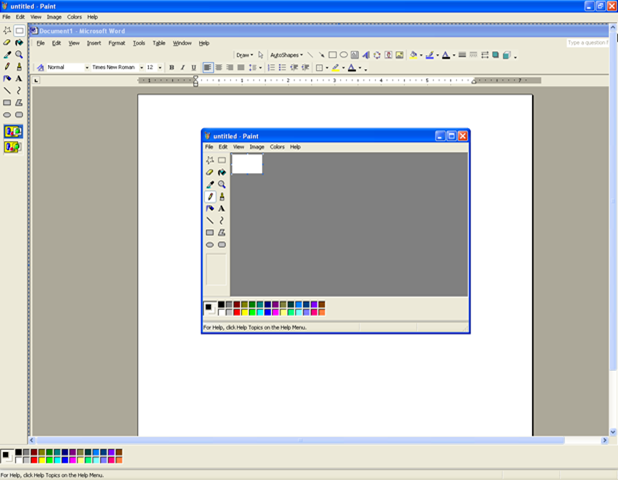
Note: This image is ‘grainy’ because it has been resized from 1280 x 944 pixels to 618 x 480 pixels to fit onto the ‘page’.
5) When the image has been correctly sized, press and hold down Alt then press the PrintScreen key on the keyboard (a copy of the current, or topmost, window will be placed on the Clipboard).
Note: a screen-shot can be taken by pressing PrintScreen alone.
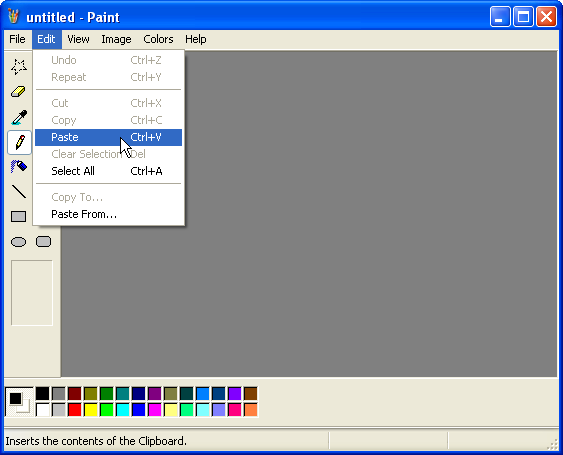
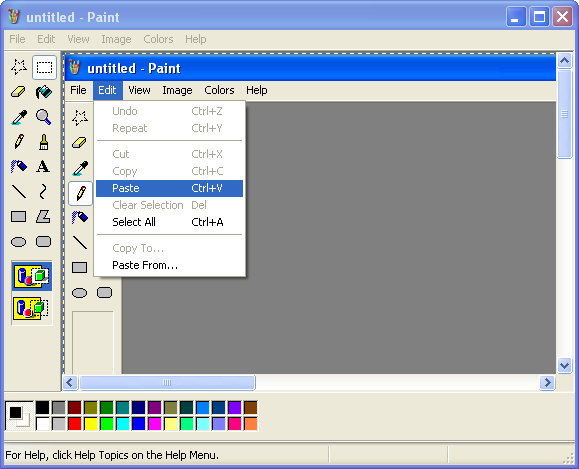
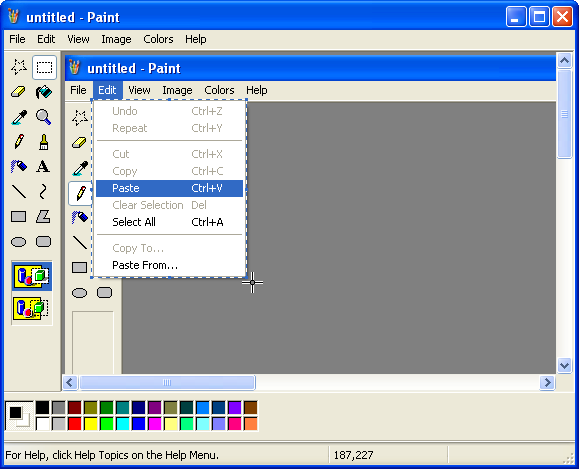
The captured image can be pasted into Paint by selecting Edit > Paste from the menu bar and then saved to the local disc for later use.
Figure 5
Note: The captured image can also be pasted from the Clipboard straight into Word, or an editor (depending on the program used) if image editing is not required, or a backup is not going to be kept.
As work progresses, the underlying Word view, and the window to be captured, can be toggled back to the ‘top’ by clicking on the Word icon in the desktop Taskbar, followed by the program icon.
Figure 6

EDITING IMAGES
Paint can be used for basic image editing.
Using the select tool
Any section of a screen-shot can be cut from the image, using the Select tool. As an example, the Paint window, in Figure 4 above, will be isolated from the screen-shot and saved for insertion into a post.
To copy and save a window contained in an image:
Note: This is a nominal exercise to demonstrate some core procedures. In practice, a window can be copied by using Alt > PrtScn.
- 1) Use the scroll arrows to position the required part of the image in the middle of the Editing Window.
- 2) Pick the Select tool from the Toolbox.
Figure 7
2) Position the select tool cursor cross over the top left hand corner of the required area and drag the cursor to surround it with the ‘cut-out’ marker.
Figure 8
Note: It is difficult to position the ‘cut-out’ markers precisely over the image, and copy it, without some over-cut on the edges. A good trick is to drag the window over top of a blank Word document before taking the screen-shot, as the background to the ‘cut-out’ will be white. If the background is white, there is no need to be precise with the ‘cut-out’ shape as the white over-cut will blend into the post background.
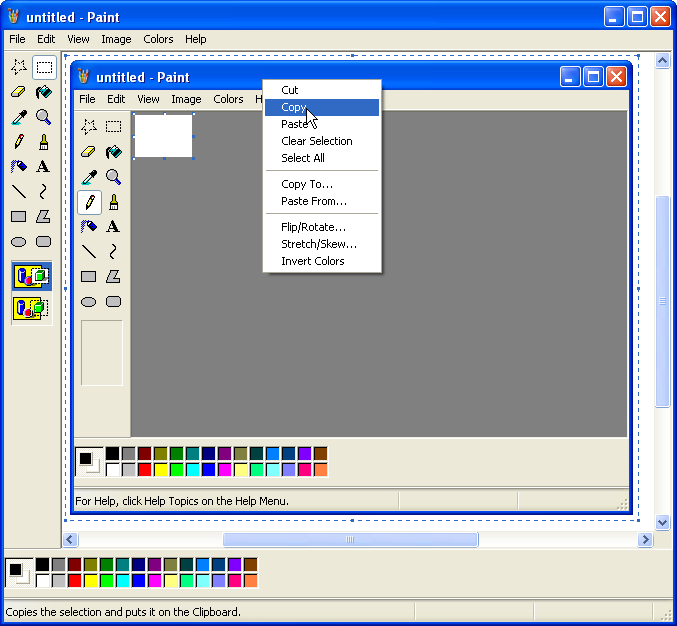
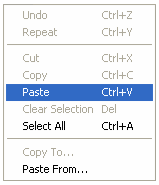
3) Right click inside the marked area and select Copy from the context menu that opens.
Figure 9
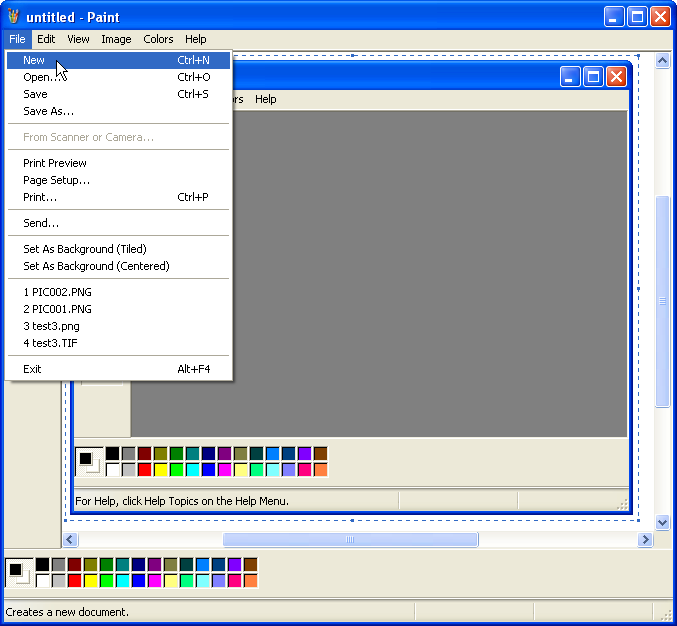
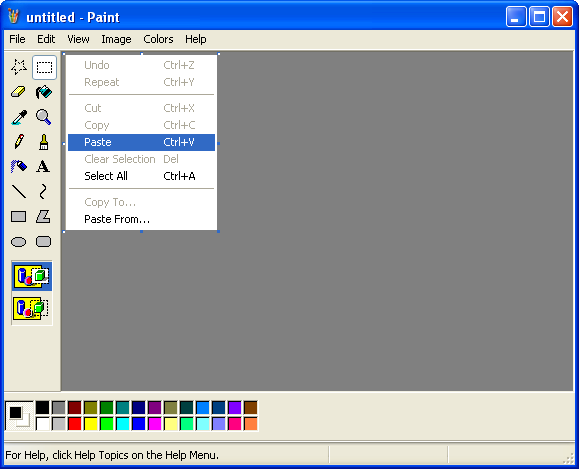
4) Select File > New from the menu-bar to open a new canvas.
Figure 10
5) Click on No when asked to Save changes to untitled? ( a new Editing Window will open).
Figure 11
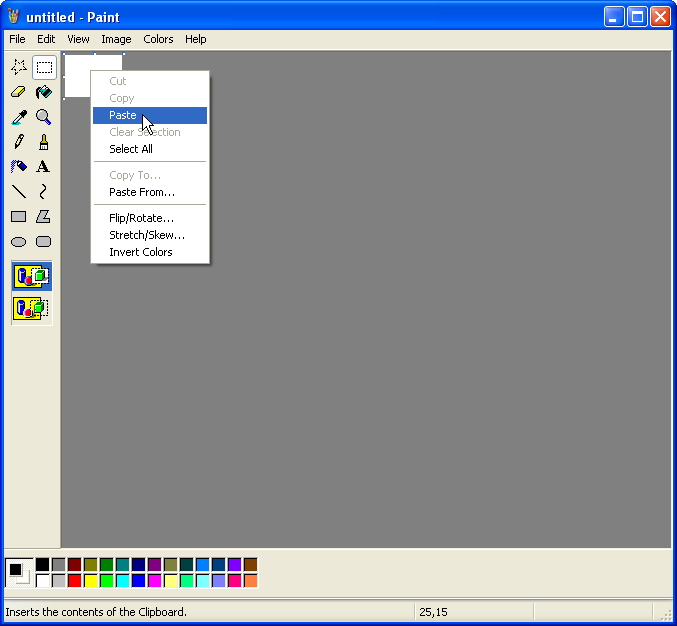
6) Right click inside the blank canvas and pick Paste from the context menu (the copy of the cut-out area will be pasted onto the blank canvas).
Figure 12
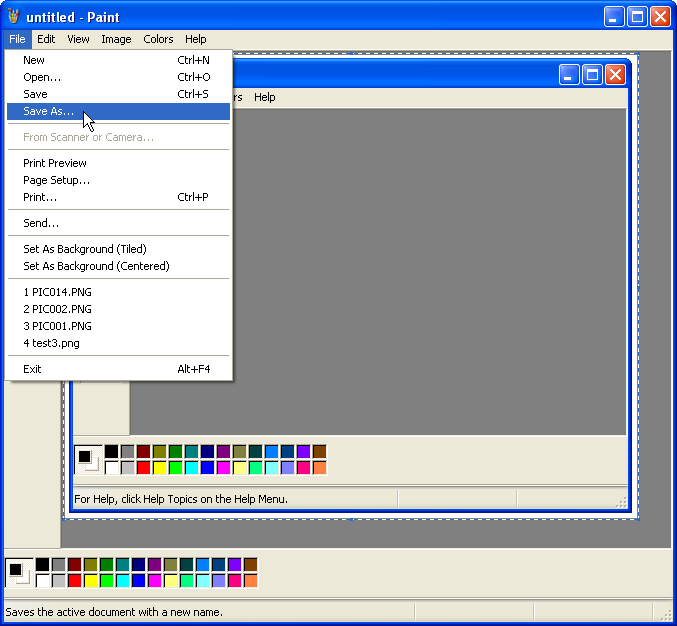
7) Go to Save As from the File menu to save the copied image (the Save As browser window will open).
Figure 13
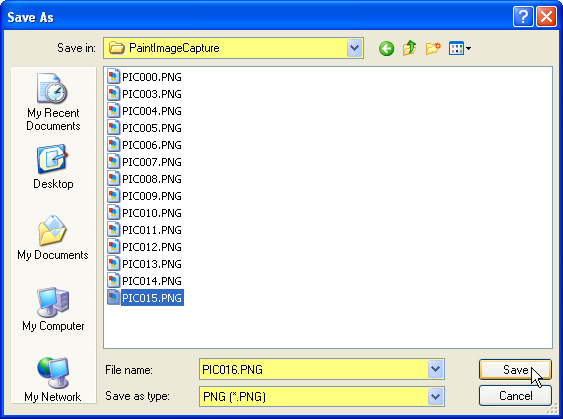
8) Select the folder to Save in and the Save as type, enter a title into File name and click on Save.
Figure 15
After the image has been saved it can be inserted into a post e.g. the image below is the window that was ‘cut-out’ and saved as a copy in the example above. Notice that when an image, with white over-cut edges, is inserted into a post the white cant be seen.
Figure 16
Note: Once again, if the image is not going to be backed up the copy of the cut-out can be pasted into an editor and Paint, or the current window, can be closed without saving.
The Select tool can also be used to ‘clip’ any part of a window e.g. toolbars, menus etc. This is a more difficult exercise, than copying a complete window, since in most cases the objects in question will be surrounded by a variety of shapes and colors so the captured images need to be trimmed with precision.
To copy a specific section of a window:
1) Capture a full-size screen-shot and paste it into Paint (if the required area of the screen is less than 6 inches sizing is not an issue).
Figure 17
2) Use the Select tool to position the cut-out marker as close as possible to the edge of the required section.
Note: If the background color of the cut-out is white it will not view well online, where the background is also white, without a border. There are two ways to work around this. Either err on the side of over-cutting to ensure that the borders, if any, are captured, or under-cut the image and add borders to it in Word. If the background color of the cut-out is not white, err on the side of undercutting as borders are not essential for colored images.
Figure 18
3) Copy and paste the cut-out onto a new canvas and save it to disc or, alternatively, paste it into an editor.
Figure 19
Clipping screen-shots, using Paint, doesn’t produce images with the precision of specialist screen capture software but the quality is still reasonable.
Figure 20

Some minor editing glitches, like the over-cut borders in Figure 20, can be worked around using a combination of Word and Paint.
Cropping images in Word
Images, cut from Paint, can be trimmed in Word.
To crop the edges of an image:
- 1) After pasting the cut-out into Paint, paste a second copy into Word.
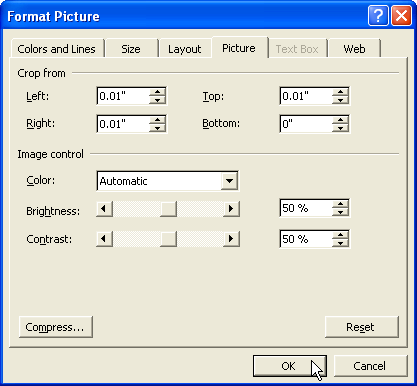
- 2) Right click on the image, in Word, and use the context menu to pick Format Picture (the Format Picture window will open).
- 3) Click on the Picture tab and use the scroll arrows, or type into the input boxes, to set the Crop measurements. Then click on OK.
Note: the default when scrolling is 0.01 inches. Finer cropping can be achieved by typing into the input boxes and using two decimal places (the settings shown in Figure 21 were used, in this example, to clean-up Figure 20).
Figure 21
The nominated amount will be cropped off each side of the image.
Figure 22

Note: Trial and error is sometimes needed to achieve the desired result. If necessary use Edit > Undo from the menu-bar to restore the image and repeat the exercise using different settings.
4) When a satisfactory outcome has been achieved, capture a screen-shot of the Word doc that contains the edited image and paste it into Paint for editing.
Note: The original version, held in Paint until a successful edit has been completed, can be dumped at this stage.
Figure 23

Note: the image can be over-cut because it now has a white background.
Although there is some loss of quality, due to the number of times the image has been copied between mediums, it still does the job.
Figure 24
Adding borders to images in Word
Borders can also be added to images that are edited in Word
To add borders to an image:
- 1) After pasting the cut-out into Paint, paste a second copy into Word.
- 2) Click on the image to select it then use Format > Borders and Shading, from the menu bar, to open the Borders window (Borders and Shading is also accessible from a right click context menu).
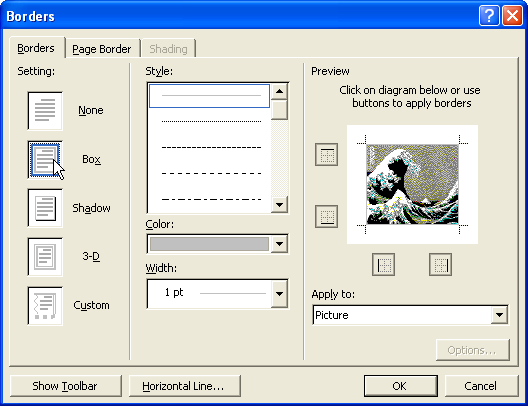
- 3) Click on the Borders tab.
- 4) Set the line Style, Color and Width, then click on Box to apply the settings to all sides of the image (they can also be applied individually using the icons in the Preview pane, or by clicking on the Preview image side by side).
- 5) Click on OK (the selected borders will be inserted around the image).
Figure 25
6) Use Paint to capture, cut-out and save the image.
EXAMPLE
Figures 26 – 28 are examples of capturing an AmiBroker chart image by:
1) Sizing the program over Word.
Note: in this example the window was over-sized relative to the Word page because it is the chart that the window contains that is of interest.
- 2) Pasting a screen-shot into Paint.
- 3) Cutting and pasting a segment of the screen-shot into Word.
- 4) Adding borders in Word.
- 5) Pasting a screen-shot of Word, containing the edited image, back into Paint.
- 6) Cutting and saving the image in Paint for insertion into this post.
Figure 26
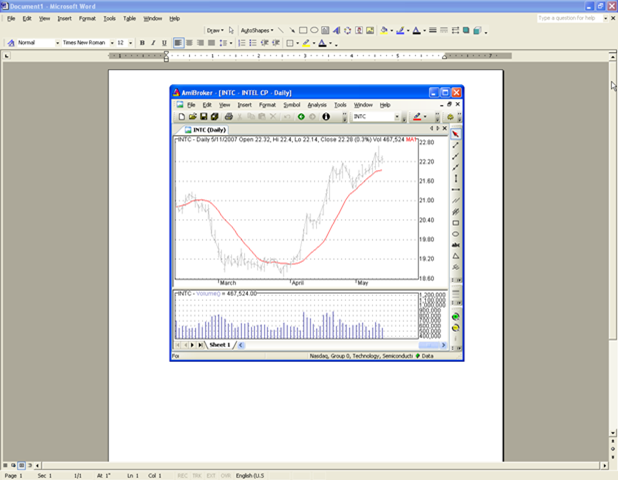
Figure 27

Figure 28
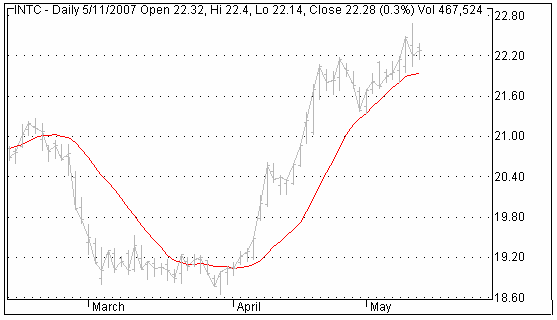
The final image isn’t too bad at all!
Additional editing features
Text and arrows etc can be added to images to clarify and highlight features.
To add a text box to a figure:
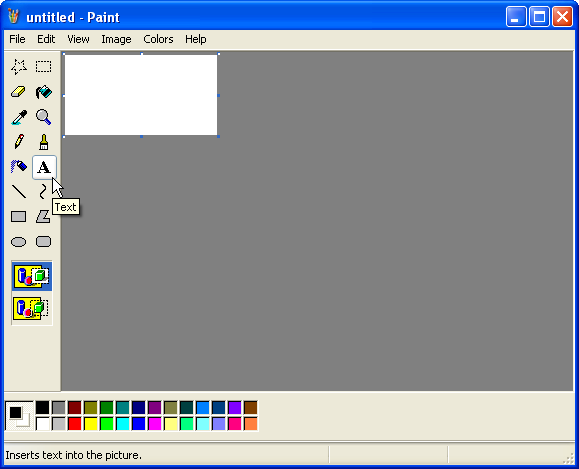
1) Click on the Text icon in the Toolbox.
Figure 29
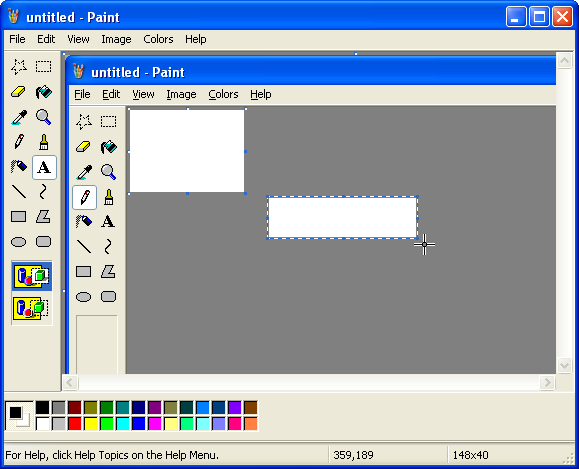
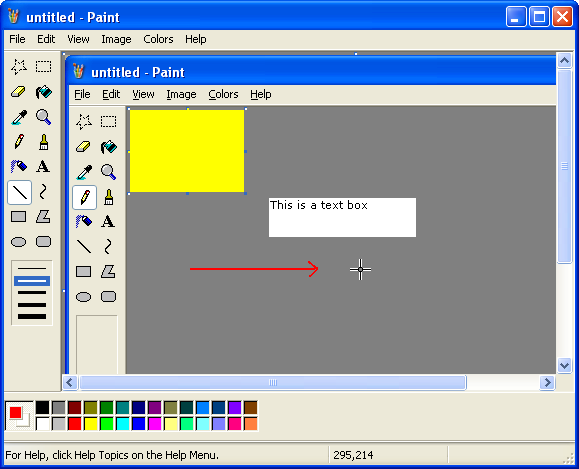
2) Position the cursor cross in the image, where the text is going to be inserted, and hold down the left mouse button while dragging it to form a box of the required shape and size.
Figure 30
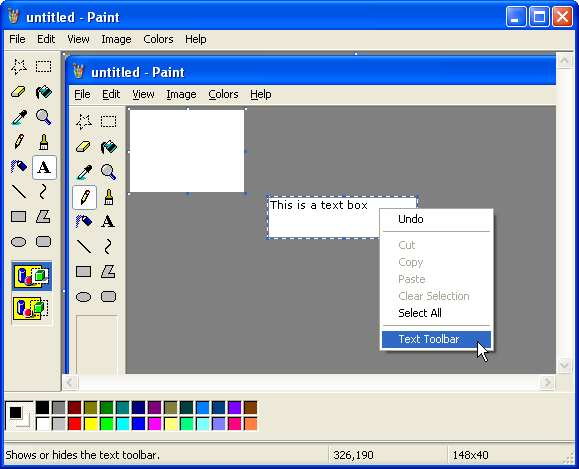
3) Type text into the box.
Figure 31

4) Right click inside the text box and pick Text Toolbar from the context menu that opens.
Figure 32
5) Text in the box can be formatted using the floating toolbar that opens.
Figure 33

Additional editing tools e.g. eraser, pencil, paintbrush etc can be used in a similar way.
Figure 34
For additional information on image editing refer to the Paint help manual.
Capturing menu bar dropdowns
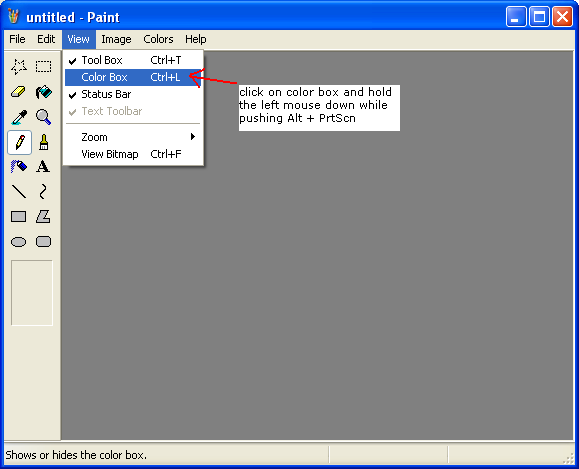
Some examples need the menu bar dropdown to be visible in the window. If Alt + PctSrn is used the dropdown will close as soon as Alt is pushed. One way around this is to position the mouse pointer over the menu (or a command in the menu) and hold the left mouse button down while pushing Alt + PrtScn at the same time (Figure 35 was ‘taken’ use this method).
Figure 35
VISTA VERSION
A new version of Paint, V6, has been included with the release of Vista, Microsoft’s new operating system. The features in V6 are almost identical to the previous version, except for the addition of image cropping.
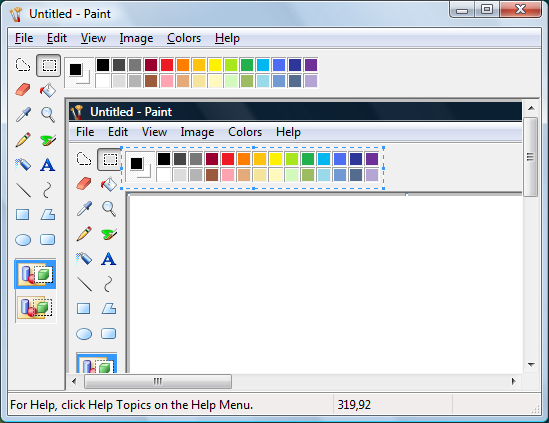
To crop images in Vista’s Paint:
1) Use the Select tool to mark the cut-out area.
Figure 31
2) Select Crop from the Image menu box.
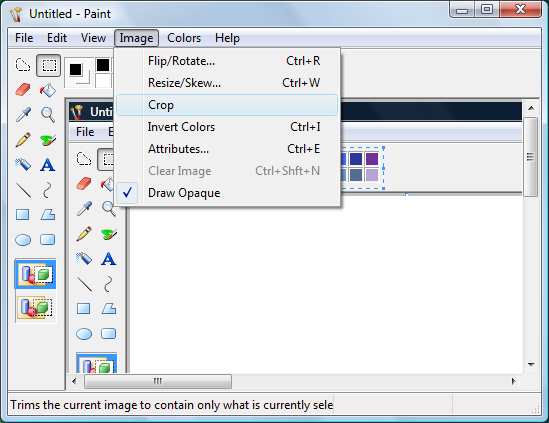
The area outside the marked section will be cropped from the picture.
3) Save the image to the local disc for future use or copy paste in straight into an editor.

Note: The crop feature can not trim the edges of images. Images with colored over-cut on the edges will still need to be pasted into Word for trimming.
To copy an image from Paint for pasting to Word, or an editor:
- 1) Open the image in Paint using the File > Open command on the menu bar.
- 2) Pick Select All from the Edit menu and then select Copy from the same menu (the Copy command in the Edit menu list will turn from gray to black when the image is selected).
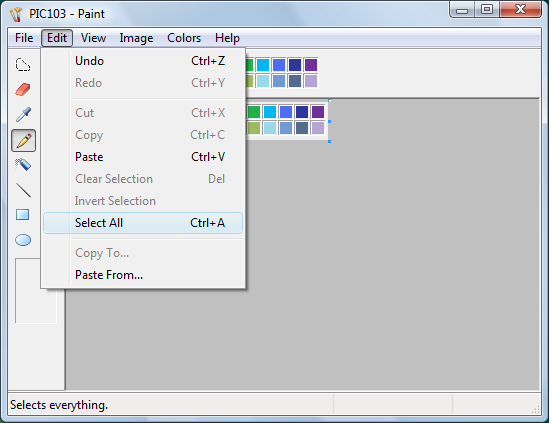
A copy of the image will be placed on the clipboard for pasting into another program in the normal way.
- version 1 – Aug9/2007 – by brian_z – written using Windows Live Writer beta 2 – SnagIt and Paint used for screen captures – all images saved in PNG format
- version 2 – Aug16/2007 – by brian_z – minor corrections – added a section on additional editing features
- version 3 – Aug17/2007 – by brian_z – added comments to Sizing Screenshots
 Filed by brian_z at 1:09 am under Contributors
Comments Off on Capturing Images Using Microsoft Paint (v3)